Question We Were Trying To Solve:
"You are a team of engineers for a bio-materials company that has a cardiovascular systems client who wants you to develop a model that can be used to test the properties of heart valves without using real specimens."
Learning Objective:
1. work through engineering design process
2. research best way to create it
3. design and create a solution
4. test prototype
5. make changes
6. report findings
Our Model:
Materials Used:
1. plastic water bottle
2. cardboard
3. popsicle sticks
4. non-latex gloves
5. hot glue
Materials Used:
1. plastic water bottle
2. cardboard
3. popsicle sticks
4. non-latex gloves
5. hot glue

Testing of Our Material (Young Modulus):
Rubber Glove:
Reflection:
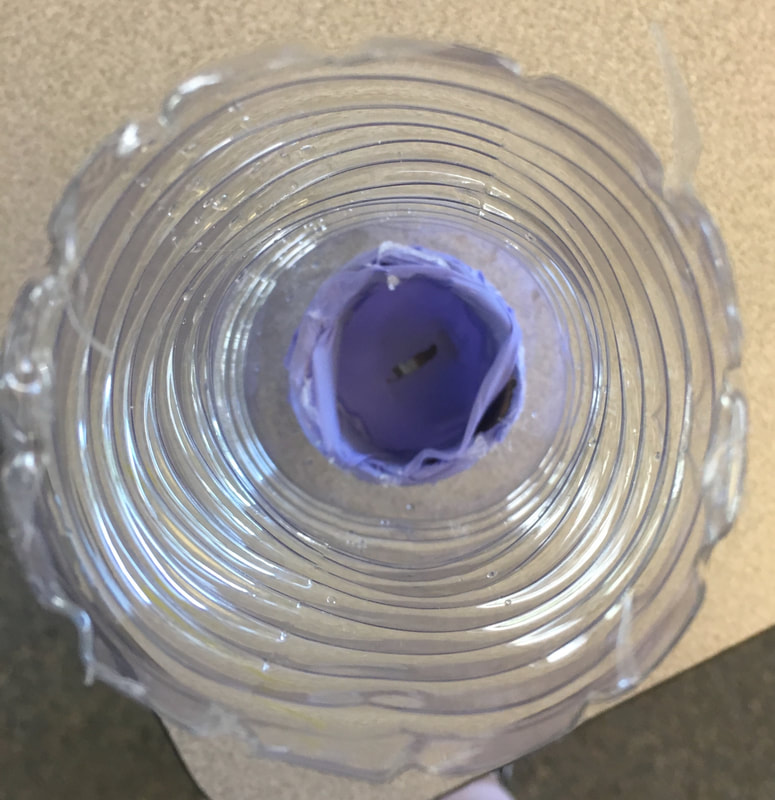
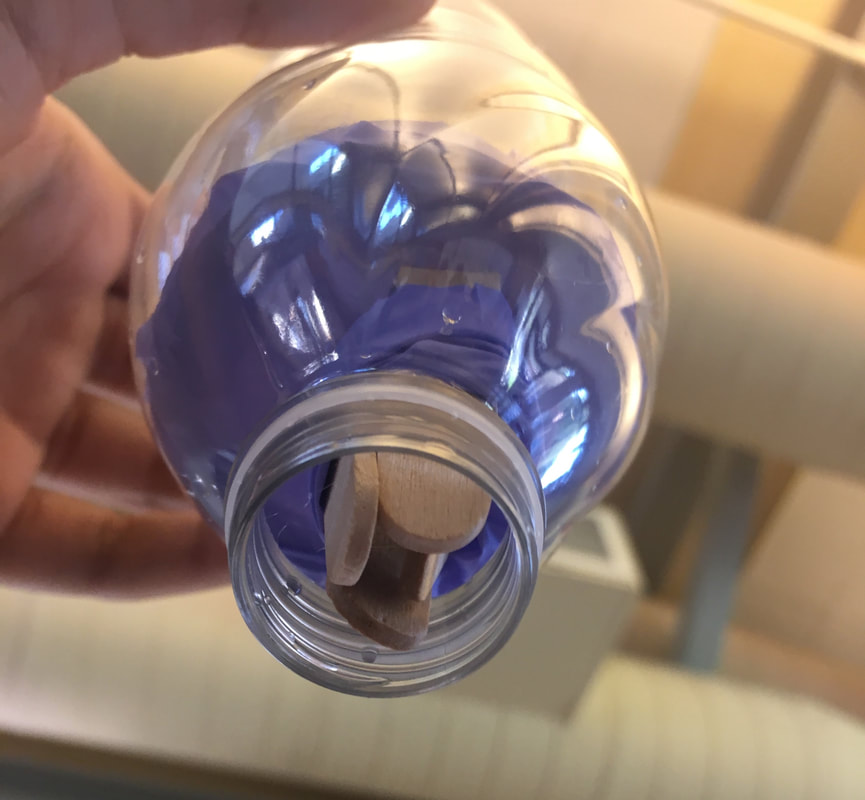
For this project, I worked with my final capstone project group, Lauren Whyte and Olivia Gonzalez. We were asked to research and create a model of a heart valve using items that were cheap and that we could find at home and to use water to help show how the heart functions. To put all of our research in one place we created a padlet that we could share with Mr. Tronconi so he could monitor our work. After researching, we started to create our model. As written above, we used a plastic water bottle, rubber gloves, popsicle sticks, cardboard and hot glue. We started with making a cardboard ring and covering it in the rubber glove material. Next, we covered one side of the ring with a layer of the glove and cut a tiny slit in it. We were trying to think of ways we could represent the function of the valve opening and closing so that there was no regurgitation of the water. After talking to Mr. Tronconi, we came to the decision to hot glue a ring of popsicle sticks around the slit and wrap the rubber glove material loosely around its base. By doing this, it would show the function of the valve opening when the water was going through, but after it would pull back together closing and preventing the water from going back up. The pros of this project was that i learned a lot about the heart that I hadn't known before and it was the first hands-on project that my group did together and it worked really well. I don't have any cons of this project, it was very interesting.
Rubber Glove:
Reflection:
For this project, I worked with my final capstone project group, Lauren Whyte and Olivia Gonzalez. We were asked to research and create a model of a heart valve using items that were cheap and that we could find at home and to use water to help show how the heart functions. To put all of our research in one place we created a padlet that we could share with Mr. Tronconi so he could monitor our work. After researching, we started to create our model. As written above, we used a plastic water bottle, rubber gloves, popsicle sticks, cardboard and hot glue. We started with making a cardboard ring and covering it in the rubber glove material. Next, we covered one side of the ring with a layer of the glove and cut a tiny slit in it. We were trying to think of ways we could represent the function of the valve opening and closing so that there was no regurgitation of the water. After talking to Mr. Tronconi, we came to the decision to hot glue a ring of popsicle sticks around the slit and wrap the rubber glove material loosely around its base. By doing this, it would show the function of the valve opening when the water was going through, but after it would pull back together closing and preventing the water from going back up. The pros of this project was that i learned a lot about the heart that I hadn't known before and it was the first hands-on project that my group did together and it worked really well. I don't have any cons of this project, it was very interesting.
